Svenska


Clippers are one of the most commonly overlooked tools in mixing and mastering. By controlling audio levels and shaping the character of the sound, they help create a more balanced and powerful mix. In this article, we at KMR Studios go through what a clipper is, how they are used, and how you can integrate the use of a clipper into your mixing and mastering process. Already know what a clipper is and want tips on which clipper is right for you? Check out our guide to 5 awesome clippers below!
What is a Clipper?
A clipper is an audio editing tool that trims the peaks of an audio signal that exceed a certain level. This makes the signal more consistent without affecting dynamics in the same way a compressor does. However, clipping often introduces harmonic distortion—though this isn’t necessarily a bad thing! It can be used to shape the tonal character of the sound.
Clipping has its roots in analog equipment, where amplifiers and tape machines naturally created distortion. Sound engineers discovered that this distortion could give a mix a fuller and more aggressive character. With digital technology, clippers have become a controlled tool in DAWs, allowing producers to choose between hard and soft clipping depending on the desired effect.
If you need direct support or help with your mix/master, check out the music services we offer by clicking the button below.
When Are Clippers Used?
Clippers are often used at multiple stages of music production:
-
Production: In the early stages, clippers can be applied to individual tracks to control the dynamics of instruments like drums and synths. It’s also common to use them in an exaggerated way during production to intentionally create clip distortion.
-
Mixing: Clippers help tame transients without significantly affecting the overall level. They are often used on drums and percussion to create a more controlled and powerful sound.
-
Mastering: In the mastering process, clippers are used to increase perceived loudness without introducing unwanted compression. This is done by subtly trimming transients with the clipper, effectively controlling and smoothing out the highest peaks in the audio file. After that, the overall level can be increased while maintaining greater control over the True Peak value. This way, you can push the loudness of your track, making it competitive with professional mixes and masters!
What’s the Difference Between a Clipper and a Limiter?
This question often comes up when learning about clippers. While their functions are similar in principle, a limiter and a clipper work in very different ways, which is important to understand when choosing the right tool.
A limiter is an extreme form of compressor that restricts peak levels by gradually reducing their amplitude. This affects the dynamics slightly but minimizes the risk of distortion.
A clipper, on the other hand, cuts off peaks instantly at a set level, introducing harmonic distortion and—when used aggressively—a more intense character. Clippers are commonly used to tame transients in drums and other percussive elements without affecting overall dynamics.
In summary, limiters are a transparent tool for controlling levels and dynamics, while clippers are used to trim transients, reduce peak values, and shape the sound through controlled distortion.
Standard Methods and Creative Applications
The most common way to use clippers is to place them after a compressor in the signal chain. This allows the compressor to reduce dynamics while the clipper handles any remaining peaks. This technique is especially effective on drum tracks and other transient-heavy sounds. However, placing the clipper before the compressor is also an option, which reduces the workload of the compressor!
Beyond standard methods, clippers can be used in more unconventional ways:
-
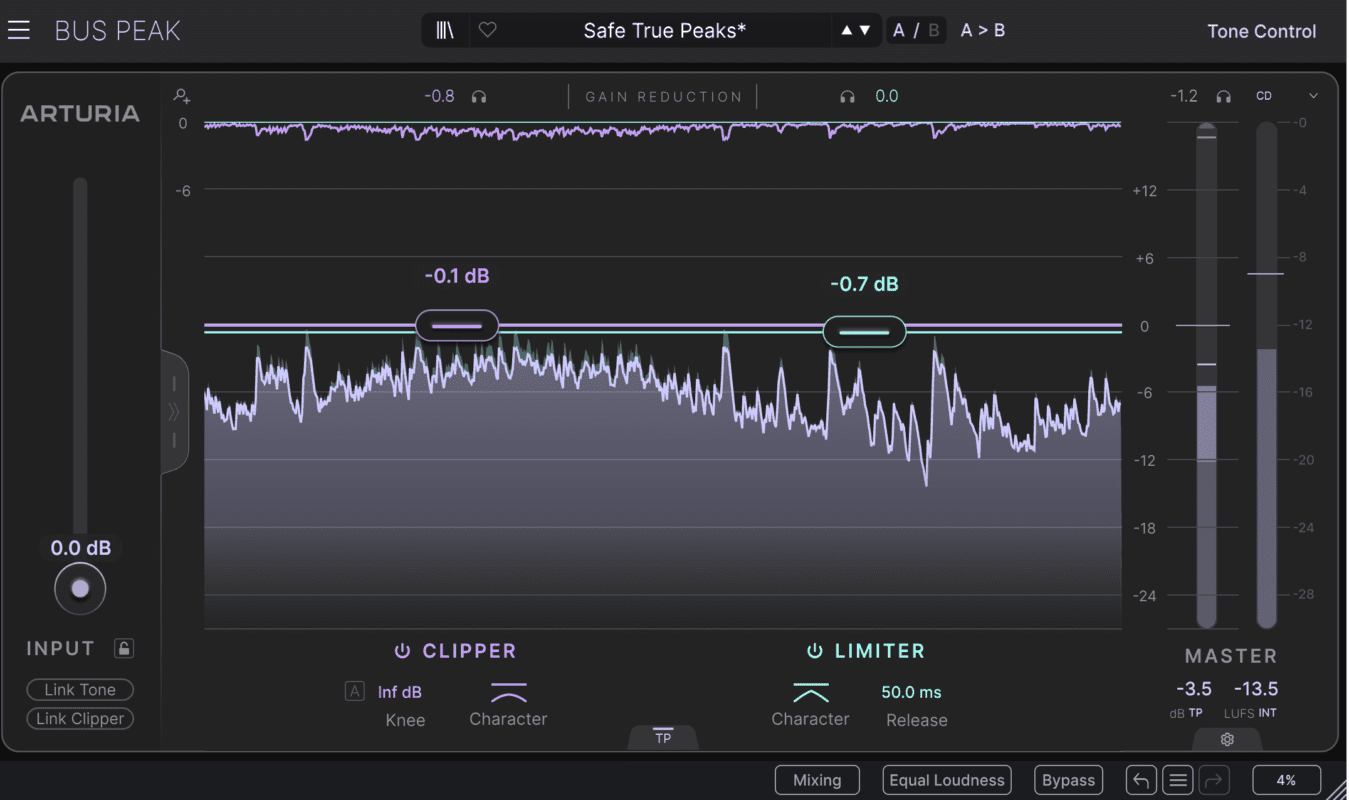
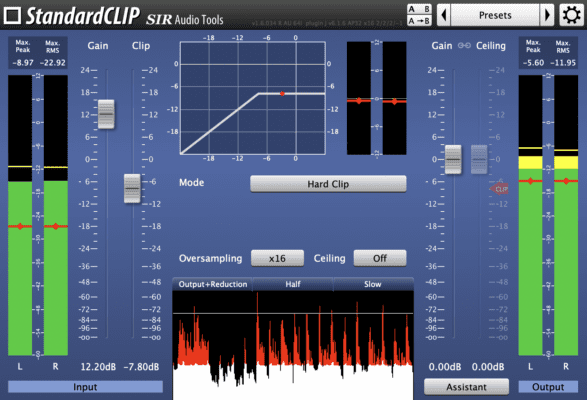
Distortion and Saturation: By intentionally overdriving a signal, you can create a warm and aggressive sound character. This aggressive tone is achieved through hard clipping, where the clipper reacts in a way similar to what you see in the example image below!
-
Creative Effects: Clippers can be used to create lo-fi effects or simulate tape distortion, adding a unique texture to your mix.
The type of distortion your clipper produces is often adjustable but varies between different clippers. If you want to learn more about specific clippers, check out our guide to 5 different clippers that can enhance your mixing and mastering workflow.
Conclusion
In this article, we’ve explored clippers as a tool and their role in the world of music production, mixing, and mastering. We hope you now have a better understanding of how to use them to enhance your mixes and masters.
If you need more hands-on help or coaching in these areas, don’t hesitate to reach out to us at KMR Studios. Best of luck on your music production journey!
Recent Articles
Guides
5 Clippers taking your mix to new heights
Are you not sure what Clipper to use when mixing [...]
Dolby Atmos Logic Pro Sound technology
Export master files from Atmos projects in Logic Pro
This article gives you detailed information on how to export [...]
Kontakta oss